Creating a portable power station can be a complex project that involves electrical engineering knowledge and safety precautions. Below is a high-level guide to help you understand the basic steps and components involved. Note that this is an overview and not a detailed step-by-step manual. Always prioritize safety and consult with a professional if you’re unsure about any part of the process.
Components You'll Need
- Battery: Lithium-ion or LiFePO4 batteries are commonly used due to their high energy density and long life.
- Battery Management System (BMS): Protects the battery from overcharging, over-discharging, and ensures safe operation.
- Inverter: Converts DC power from the battery to AC power for standard household appliances.
- Charge Controller: Manages the power coming from solar panels (if you plan to include solar charging) to safely charge the battery.
- DC-DC Converter: Steps up or steps down the voltage to match the requirements of different devices.
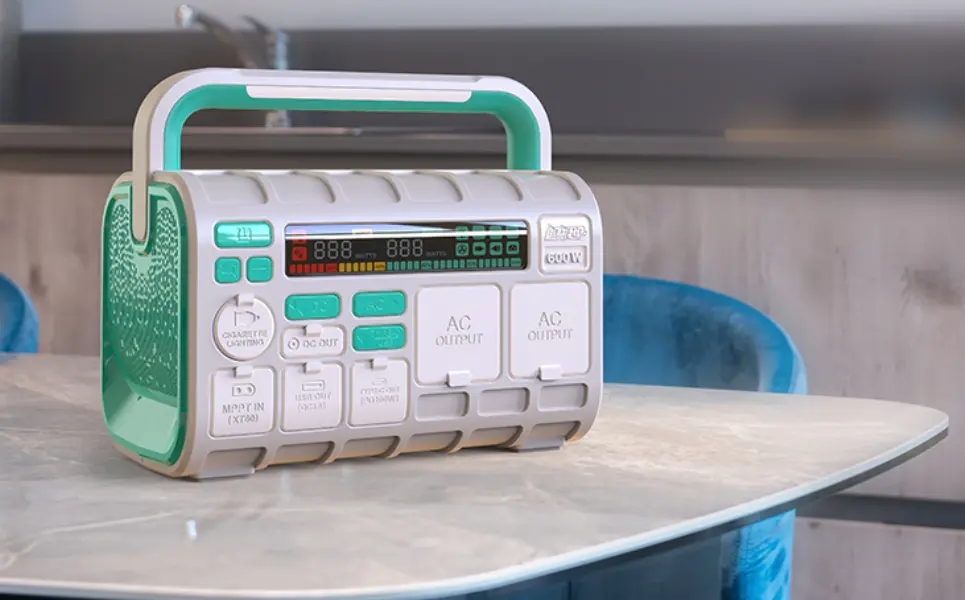
- Power Input and Output Ports: USB ports, AC outlets, DC car ports, etc.
- Enclosure: A durable case to house all the components.
- Cabling and Connectors: Wires, connectors, and possibly a fuse box for safe connections.
Tools You'll Need
- Screwdrivers
- Wire cutters/strippers
- Soldering iron and solder
- Multimeter
- Drill (for mounting components in the enclosure)
Steps to Build a Portable Power Station
- Design and Plan:
- Determine your power needs (watt-hours, voltage, and current requirements).
- Sketch a wiring diagram to plan how all components will be connected.
- Select Components:
- Choose a battery with sufficient capacity (e.g., 12V, 100Ah).
- Select an inverter that matches your power requirements (e.g., 500W, 1000W).
- Ensure the BMS is compatible with your battery type and capacity.
- Assemble the Battery Pack:
- If using individual cells, connect them in series or parallel to achieve the desired voltage and capacity.
- Connect the BMS to the battery pack following the manufacturer’s instructions.
- Install the Inverter:
- Connect the inverter to the battery terminals, ensuring the correct polarity.
- Secure it inside the enclosure.
- Set Up the Charge Controller (if using solar panels):
- Connect the solar panels to the charge controller.
- Connect the charge controller to the battery.
- Add Power Input and Output Ports:
- Install USB ports, AC outlets, and DC car ports in the enclosure.
- Wire them to the battery or inverter as needed, ensuring all connections are secure and insulated.
- Test the System:
- Use a multimeter to check all connections for correct voltage and polarity.
- Test each output port to ensure they are providing the correct voltage and current.
- Secure Everything in the Enclosure:
- Mount all components securely inside the enclosure.
- Ensure proper ventilation to prevent overheating.
- Final Checks:
- Double-check all connections.
- Ensure the BMS is functioning correctly to protect the battery.
- Safety Precautions:
- Always wear protective gear when working with batteries and electrical components.
- Ensure all components are rated for the voltages and currents they will be handling.
- Consider adding fuses or circuit breakers for additional safety.
Important Notes
- Safety First: Mishandling batteries, especially lithium-ion, can be dangerous. Ensure you understand the risks and take appropriate precautions.
- Regulations: Check local regulations regarding the construction and use of portable power stations.
- Professional Advice: If you’re not experienced with electrical projects, consult with a professional to ensure your power station is safe and reliable.
Building a portable power station can be a rewarding project, but it requires careful planning and attention to detail. Make sure to do thorough research and take all necessary safety measures.